Ultrasonic Parts Cleaner Specification Tips
You most likely have parts cleaning challenges not easily resolved by brushes, solvents, wash tanks, sprays and other manual methods that fail to yield satisfactory results. These can all be solved with an ultrasonic parts cleaner.
Here you will learn that cleaning parts, whether new or refurbished, is best accomplished in an ultrasonic parts cleaner. And why mechanics, hobbyists, collectors, manufacturers and others dealing with dirt of most any type rely on an ultrasonic parts cleaner for fast, damage-free results.
Examples Where Ultrasonic Parts Cleaners Shine
- Ultrasonic cleaning eliminates risking damage that can result from manually removing post-molding contaminants such as flashing, grease and other residues from costly plastic injection molds.
- Ultrasonic parts cleaning is unsurpassed in terms of speed and thoroughness when it comes to removing dried grease, varnishes and other contaminants from carburetors, fuel injectors and other critical engine components.
- Cleaning diesel particulate and exhaust gas recirculation filters
- Cleaning once fired brass cartridge casings prior to reloading.
- Cleaning finely machined parts to remove cutting oils and abrasive compounds
- Nondestructive testing aircraft engine components as part of maintenance and operations
Here’s How Ultrasonic Parts Cleaners Work
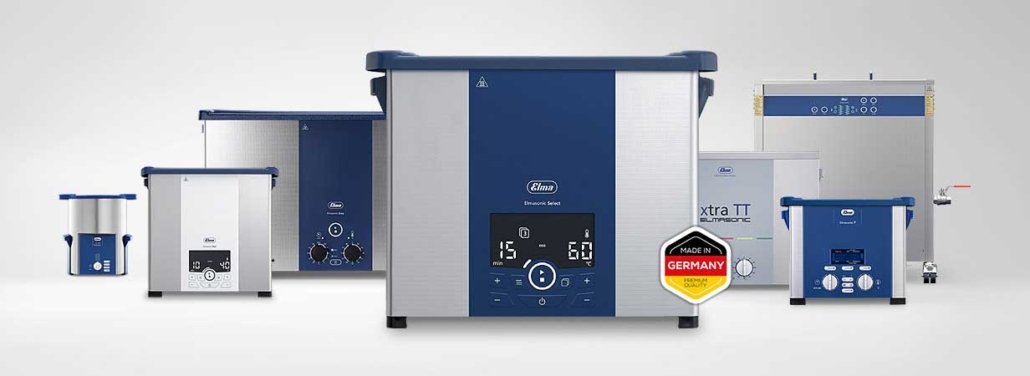
Ultrasonic parts washers are offered in a variety of sizes from tabletop units holding under a gallon to industrial units holding multiple gallons of biodegradable ultrasonic cleaning solution (examples provided below).
When the unit is activated generator-powered transducers affixed to the tank are excited and vibrate at ultrasonic frequencies such as 37,000 cycles per second (37 kHz).
The vibrations cause the formation of microscopic vacuum bubbles that implode violently on the surfaces of parts immersed in the solution.
These powerful implosions blast loose and carry away even the most tenacious contaminants from the surfaces. And because the bubbles are so small, they penetrate fine cracks, crevices and blind holes of products being cleaned – surfaces impossible to reach via mechanical brushing. This cleaning process is called ultrasonic cavitation.
For more information on this please check our in-depth review of ultrasonic cleaners on iultrasonic.com.
Specifying your Ultrasonic Parts Cleaner
Tip No. 1: Know Your Requirements
The number and size of parts you’ll be cleaning, as well as the degree of contamination to be removed, serves as a guide to the type of unit you’ll need. If your requirements are minimal, we suggest considering the Elmasonic E+ series available in cleaning solution capacities from .25 to 7.5 gallons.
Should your parts be heavily contaminated and require long-term cycles a suggestion is the Elmasonic xtra TT units in 4 tank sizes from 0.8 to 4.8 gallons.
Elma xtra TT ultrasonic parts washers feature heavy-duty stainless steel cleaning solution tanks that can operate continuously up to 8 hours a day. Operating at 37 kHz, they have a permanent sweep mode to assure uniform cleaning and a switchable dynamic mode to increase peak ultrasonic performance.
If your ultrasonic parts cleaning operations are large scale, take a look at the floor mounted Elmasonic XT series in 7 tank sizes with cleaning solution capacities from 8 to 67 gallons, operating up to 8 hours a day at 25 kHz for heavily soiled parts or 45 kHz for finer cleaning.
Please explore our ultrasonic parts washer selection and feel free to call or chat with our experts for suggestions.
Tip No. 2: Positioning Parts in an Ultrasonic Washer
Dumping parts in the ultrasonic parts washer basket and immersing them in the cleaning bath will not only lead to unsatisfactory results, it may also result in damaging the parts. Here’s why:
Ultrasonic energy – the cavitation bubbles – moves up through the solution to the surface, where it is reflected back down.
In doing so the bubbles contact and implode upon surfaces being cleaned and carry away contaminants.
For maximum parts cleaning efficiency you should position parts to allow maximum exposure to sonication. Ideally, they should be positioned in a single layer. Otherwise, parts above the bottom layer will experience diminished cavitation cleaning action.
In other words, do not overload the basket. If you are cleaning several parts and this proves impractical periodically remove the basket from the solution, reposition the parts then re-immerse them.
Note: Never reach into an operating bath. It may be hot, and cavitation energy can penetrate your skin to act on body fluids.
Tip No. 3: Ultrasonic Cleaning Complex Shapes
Parts with machined holes should be placed so the holes are vertical or diagonal in the bath. This allows contaminants to fall out as they are blasted away by sonic action.
Blind holes can trap air prohibiting cleaning solution entry. If parts contain blind holes they must be positioned and repositioned as necessary to remove trapped air before cleaning. Follow the same precautions noted in Tip No. 2 regarding repositioning.
Tip No. 4: Avoid Potential Surface Damage
Sonic vibration in a ultrasonic parts cleaning basket will cause parts to vibrate against each other and against wire mesh cleaning baskets. This vibration can damage highly finished or machined surfaces. (This is another reason to avoid overloading baskets.)
If finishes are highly critical ask us about a silicon nap mat or polycarbonate plate that fits on the bottom of the basket.
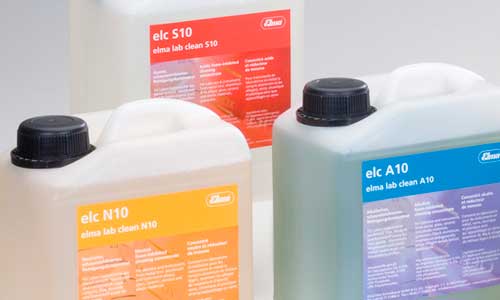
Tip No. 5: Selecting your Ultrasonic Parts Cleaning Solution
Along with the many varieties of ultrasonic cleaners on the market there are also a variety of cleaning solution chemistries available for cleaning parts.
A widely used cleaning solution formulation is elma tec clean A4 used on engine parts, metals, glass and ceramics to remove oil, grease, combustion residues and other contaminants. Biodegradable, it is diluted to 2 to 5% with water, making it extremely economical for an ultrasonic parts cleaner.
For information on this product and other options for your ultrasonic parts cleaner please check our list of ultrasonic cleaning solutions. Another resource is our post on selecting an ultrasonic cleaning solution.
Tip No. 6: Maintaining your Ultrasonic Parts Cleaner Solution
The link on selecting a cleaning solution notes that contaminants removed during the cleaning process remain in the cleaning solution and eventually reduce performance.
While performance can be extended by the means suggested in that post, eventually the solution must be changed.
Drain and dispose of it along with skimmed off contaminants according to local regulations. Take time to clean the tank following the user manual. Then fill and degas fresh solution to continue your cleaning operations.
Questions? Call or Chat With Us
Our cleaning experts are available to discuss equipment, processes, and cleaning solution formulations to meet your ultrasonic parts cleaner requirements.

